Here’s a step-by-step guide to install the Taggbox Commerce shopify app and create & publish shoppable galleries and feeds on your shopify website.
For your ease, the guide has been divided into 4 key sections which are mentioned below:
- Installing App & Adding Content To Gallery
- Tagging Products To Make It Shoppable
- Moderate Content or Customize Gallery
- Publish Gallery on Your Shopify Store
So, let’s get started…
SECTION 1: Installing Taggbox Shopify App
1. Go to the Shopify App Store and search for “TAGGBOX COMMERCE”
2. Select the Taggbox app and Add The App to your shopify apps
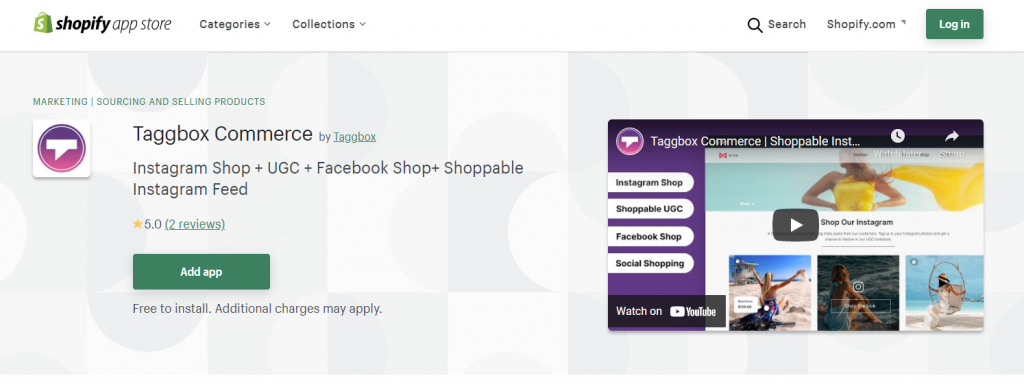
3. Install Taggbox Commerce App and you will be redirected to your Taggbox account
4. You will see the editor section with multiple social media platform options
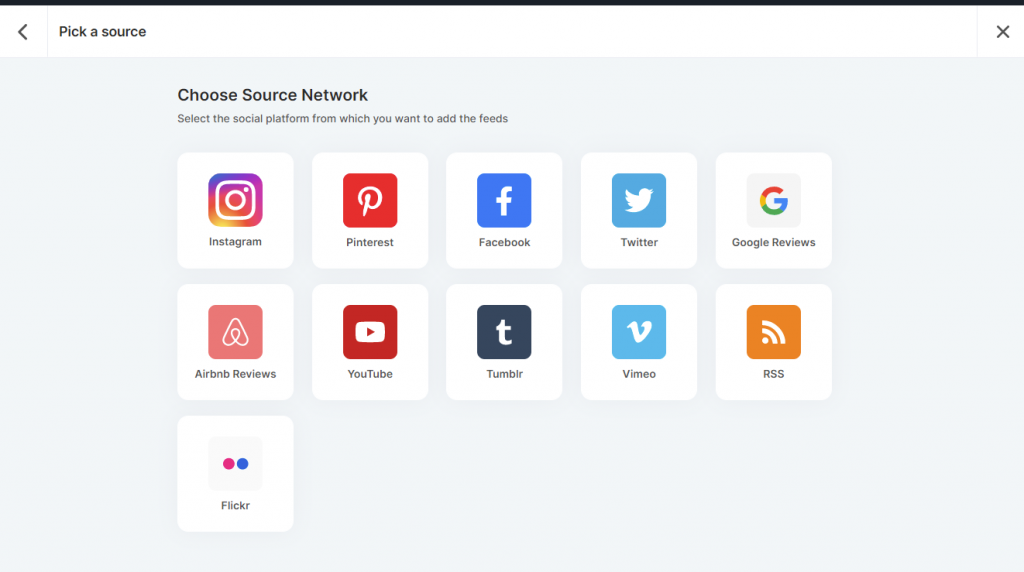
5. Select the Social Platform from which you want to collect feeds (content).
Let’s choose Instagram as an example here.
6. A popup will appear, Choose your feed type like HASHTAG, HANDLE, STORIES, etc. and click on Create Feed
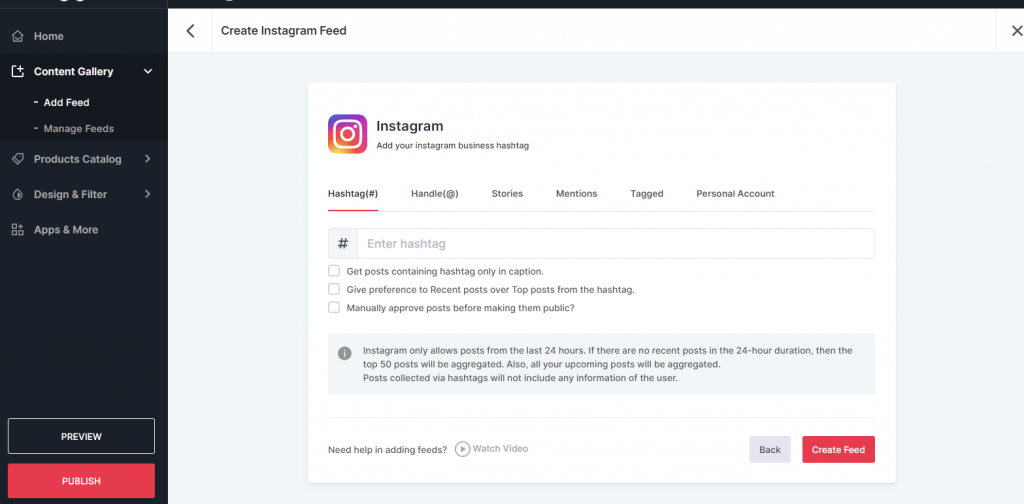
IMPORTANT: You will need to connect your chosen social media platform to successfully collect the content.
Once you complete the authentication process and connect social media, you will get all the posts in your Taggbox account
Section 2: Tagging Products To The Posts In Gallery
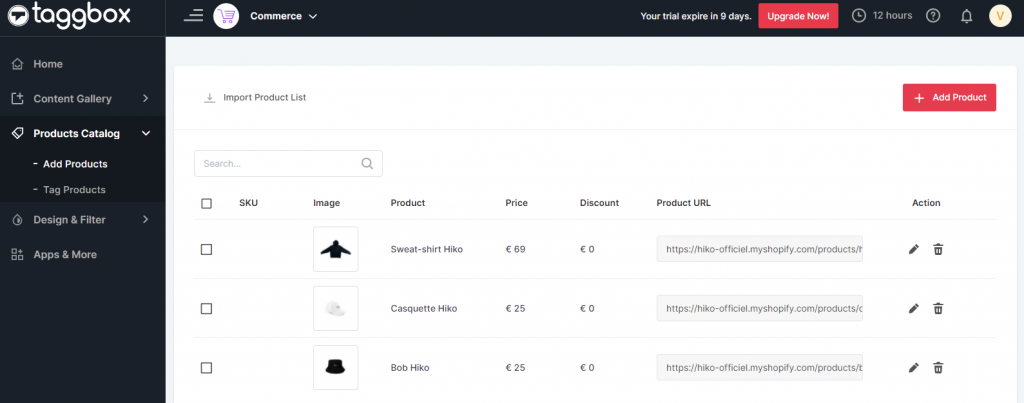
IMPORTANT: You don’t need to sync your shopify products catalog. Taggbox will automatically fetch your shopify products catalog.
You can find the shopify products in the Add Products section under Product Catalog in sidebar.
7. Now you will see all your collected posts with an option of “Tag Products” under each post
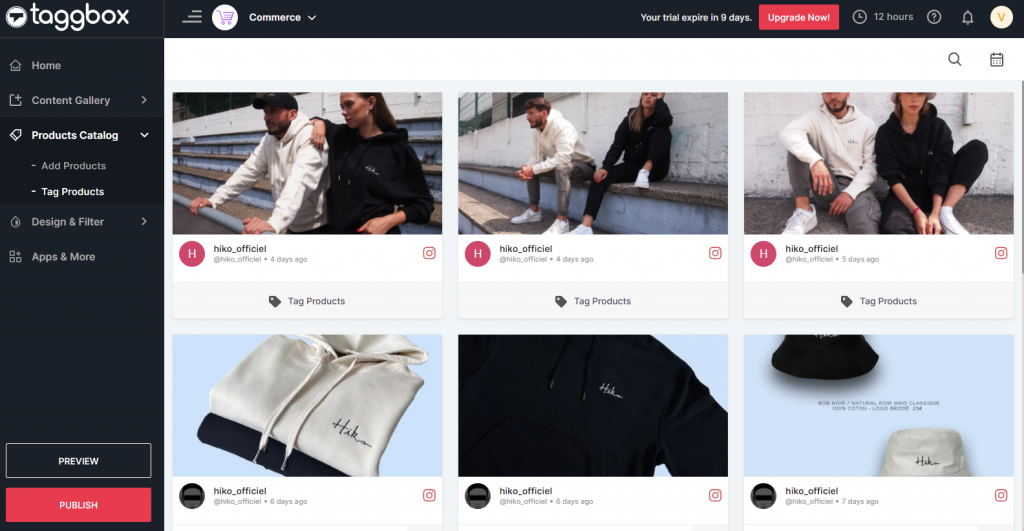
8. Click on the “Tag Products” button and a popup will appear, search the name of the product that you want to tag to the post.
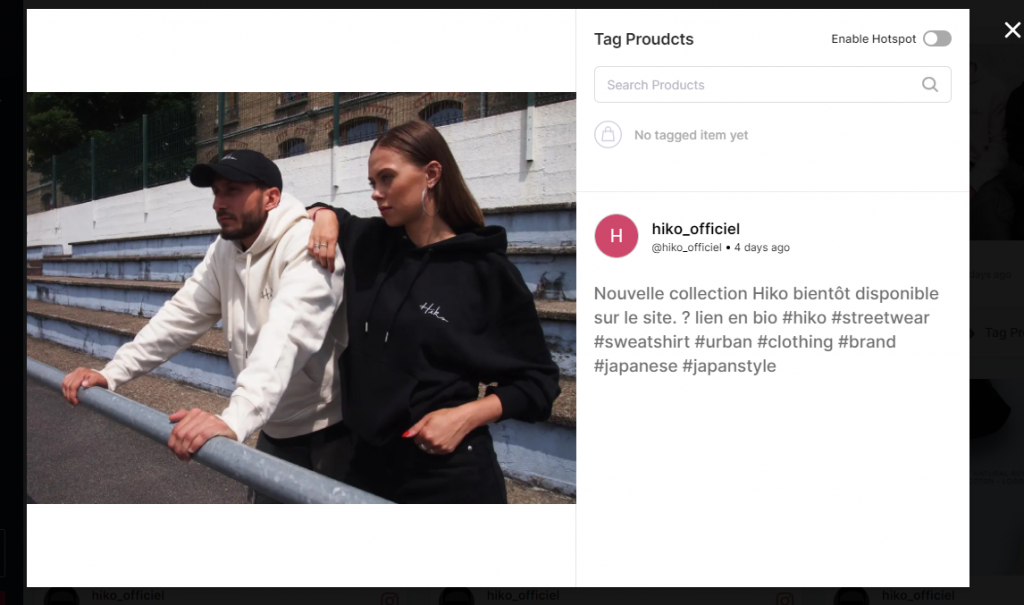
9. Click on the Product in the search bar and it will be tagged to the post.

You can enable the Hotspots from this popup. Once you enable it, a hotspot will appear in the top left corner of the image. Drag and drop the hotspot on the product in the post.
10. Similarly, you can tag products to all the posts and make your gallery shoppable.
The product tagging process is complete. It is time to moderate and customize your gallery.
Section 3: Moderate Content & Customize Gallery
This section will help you filter posts, design your gallery and personalize the CTAs.
11. Click on the Design & Filter section in sidebar, a drop down menu will appear
12. You can choose the different options from menu like Themes, Customization, CTA, and Moderation
13. Click on moderation to make some posts PUBLIC (Visible) or PRIVATE (Hidden) from the gallery
14. Go to themes and customization to change the look and feel of gallery
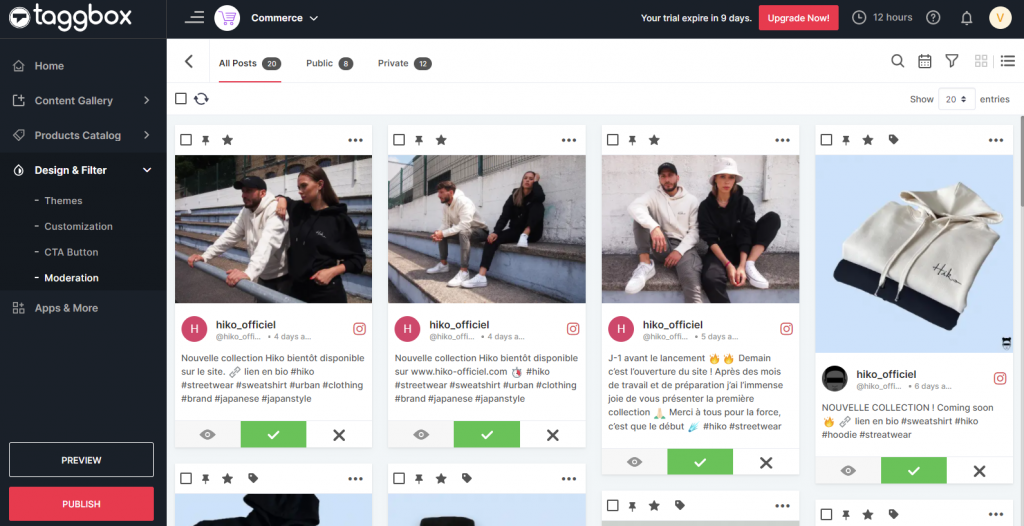
Once you are done with designing and moderation then it is time to Publish your shoppable gallery on shopify website.
Section 4: Publish Shoppable Gallery On Shopify
15. Click on the Publish button at the bottom left corner in the Gallery editor
16. You will see a Shopify publishing section with Automatic & Manual Publishing options
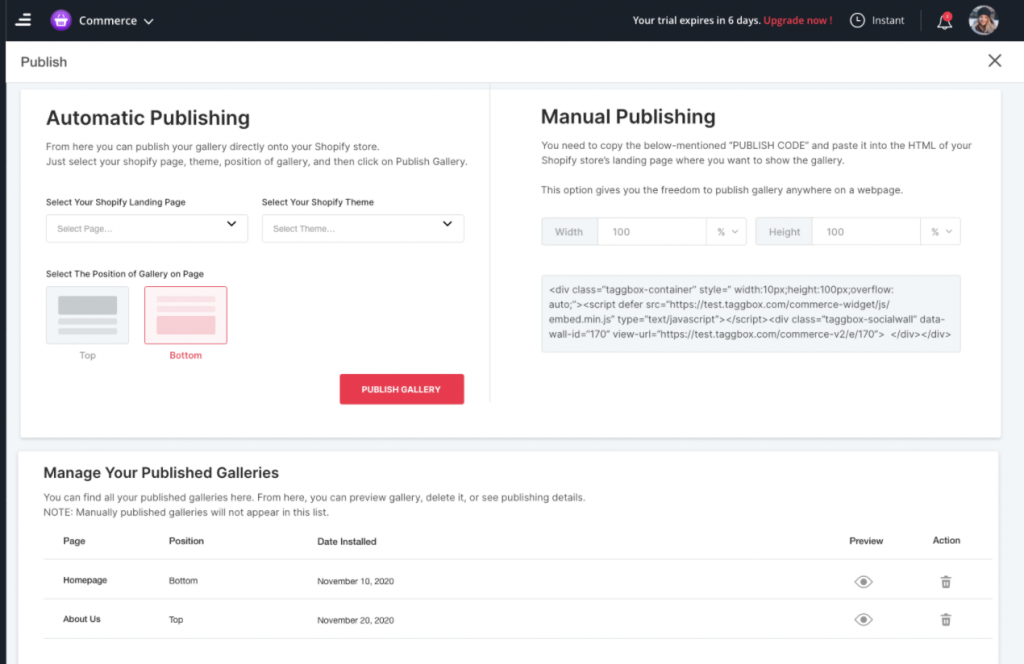
Automatic Publishing: It allows you to publish your gallery automatically on Shopify without any hassle or technical efforts. With automatic publishing, you can do the following actions:
- Page: Select the page of your Shopify store where you want to publish it
- Theme: Choose the theme that you want to use from your shopify store
- Position: Choose the position on the page where you want to show the gallery
Once you are done with above option then click on PUBLISH GALLERY to successfully publish it on Shopify
Manual Publishing: This option allows you to copy the “PUBLISH Code” and paste it as HTML anywhere on any of your Shopify page.
With manual publishing, you have the freedom to publish the shoppable gallery anywhere on a landing page.
IMPORTANT: You can also manage the installations from this section be it Preview or deleting the gallery from the store.


