Learn how to collect content from your preferred source and turn it into a shoppable gallery in just a few simple steps.
Tagshop offers all major platforms to fetch content and curate a feed.
Step 1: Login To Your Account
- Log in to your existing Tagshop account or create a new account by selecting your preferred plan. Tagshop offers a free trial of 14 days.
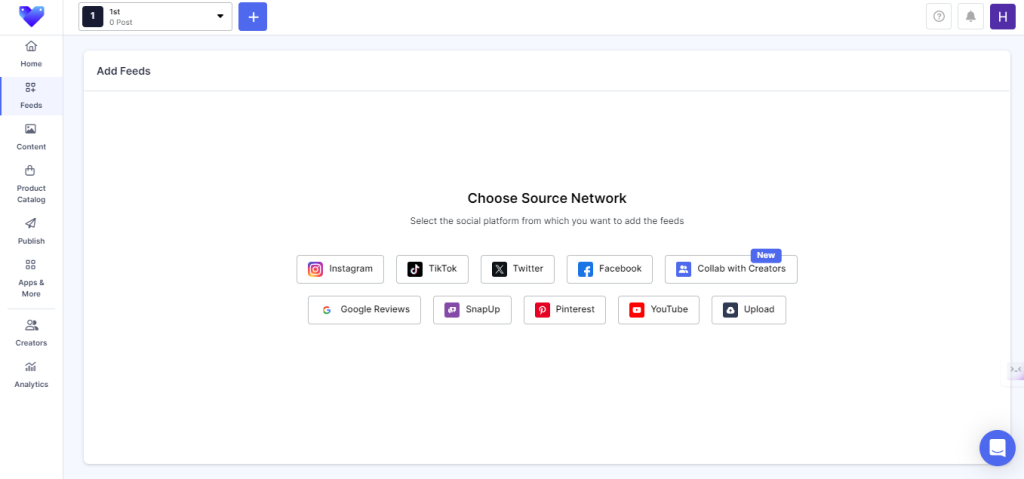
Step 2: Collect Content
- Now, on the Home Screen, choose the Connect tab, and select the first option to connect your account.
- For the next step, choose your preferred source network. Let’s select Instagram as an example here.
- Now, connect your social media platform to Tagshop.
- Once done, choose the source through which you want to collect content. Let’s choose @handle here, for example.
- You have collected content successfully. To add more feeds, you can select ‘Add Feeds’ in the Content sidebar.
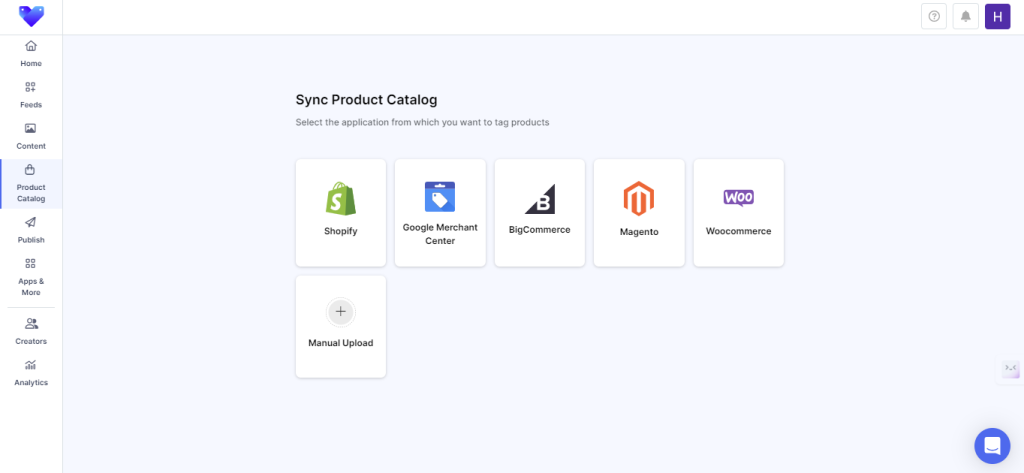
Step 3: Sync Your Product Catalog
- Time to sync your products. To proceed, select ‘Product Catalog.’
- From the provided platforms, select your preferred CMS application and fill in your store details.
- Or, you can manually upload your products by uploading your CSV File or adding single products individually.
- Your product catalog is now successfully added. You can now start adding product tags to your content.
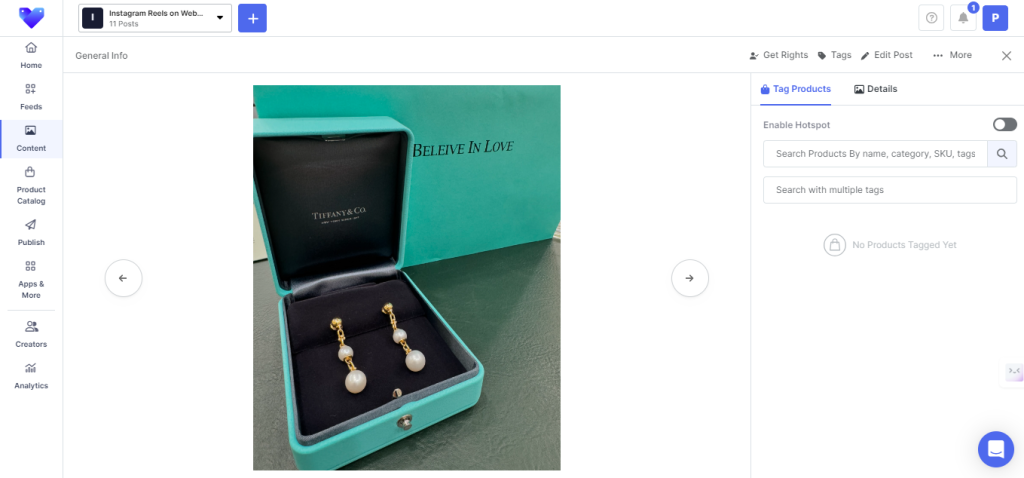
Step 4: Add Product Tags
- Now comes the final step. Go to the ‘Content’ section on the sidebar, your feed of collected content will appear.
- To add product tags, select the ‘Tag products’ button provided over the content. Search the product and click on ‘Save.’
- With Tagshop’s Hotspot feature, you can also add multiple product tags. Select ‘Tag Products’ button.
- From the pop-up, turn on ‘Enable Hotspot’ option and start tagging products. It’s that simple!
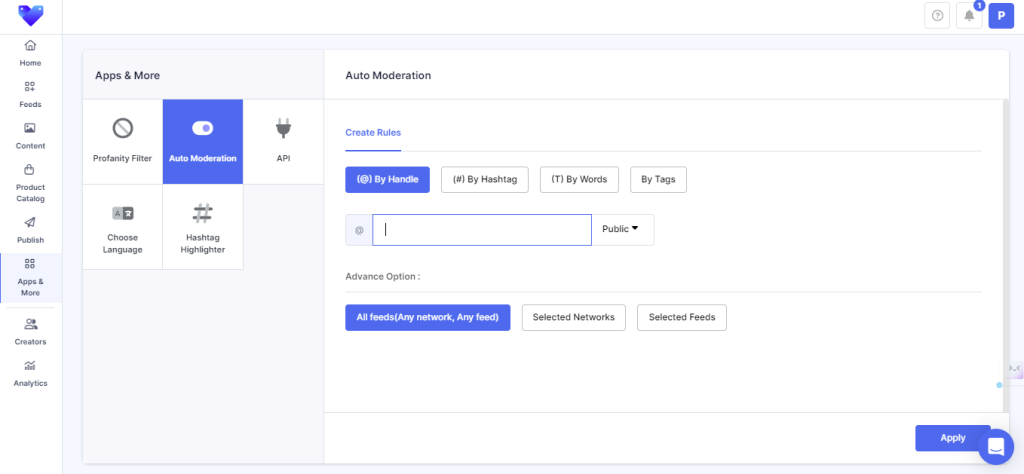
Step 5: Moderate Your Feed
- For the final steps, moderate your feed by making the irrelevant posts private and keeping the posts you like public.
- In the ‘Apps & More’ section on the sidebar, moderate your content gallery further with ‘Profanity Filter’ and ‘Auto-Moderation.’
Voila! You have successfully collected content from your preferred platform and created a shoppable gallery! Wasn’t that easy?
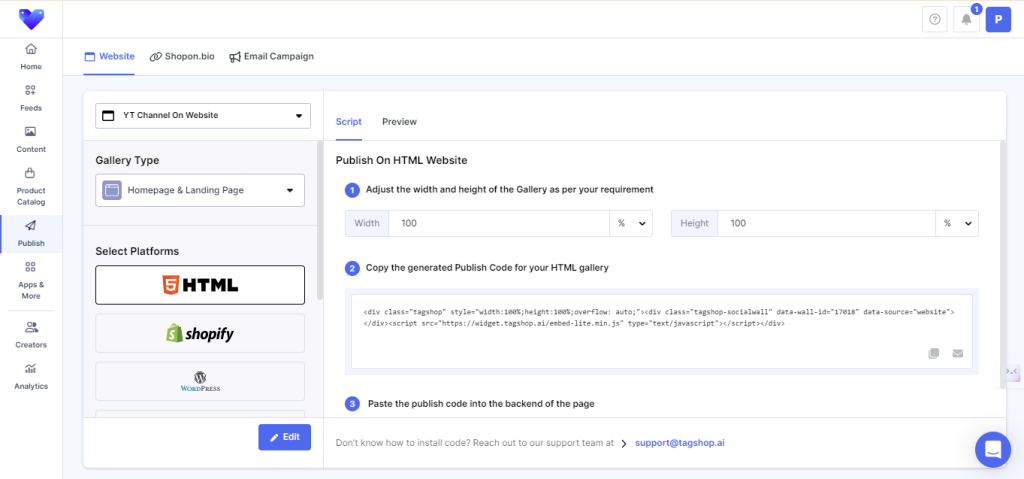
Step 5: Publish Your Feed
You can publish your shoppable feed to any e-commerce landing page on your website.
Tagshop offers:
You can click the links to find out a complete guide on how you can publish your gallery.
That’s all for this guide. For more such queries, explore this space.


