A complete guide to help you create and publish a tag-based gallery on your eCommerce website. A tag-based gallery can help you curate product-specific feeds, making your gallery highly relevant.
So, let’s begin.
Section 1: Collect Content
- The first step is to create your Free Tagshop account or Log in to your existing account.
- After logging in, on the Home Screen, go to Connect > Create Your Gallery, and select the first tab → to connect your preferred social media platform.
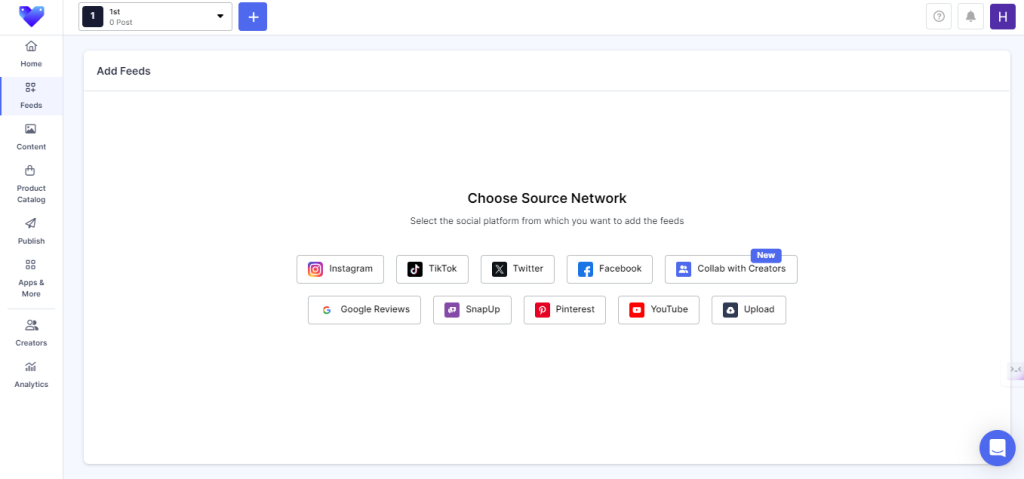
- For the next step, connect your preferred social network from the list of many platforms that Tagshop provides. For example, let’s choose Instagram here.
- Now, start fetching content simply by connecting your Instagram account.
- Once your social media is connected, pick a feed source like Hashtags, Stories, User Handles, Mentions, etc., and click on ‘Create Feed.’
Note: You can add more feeds later from the Add Feeds option under the ‘Content’ dashboard.
Your content is collected successfully. Now, upload your product gallery to start tagging your products.
Section 3: Add Products Tags
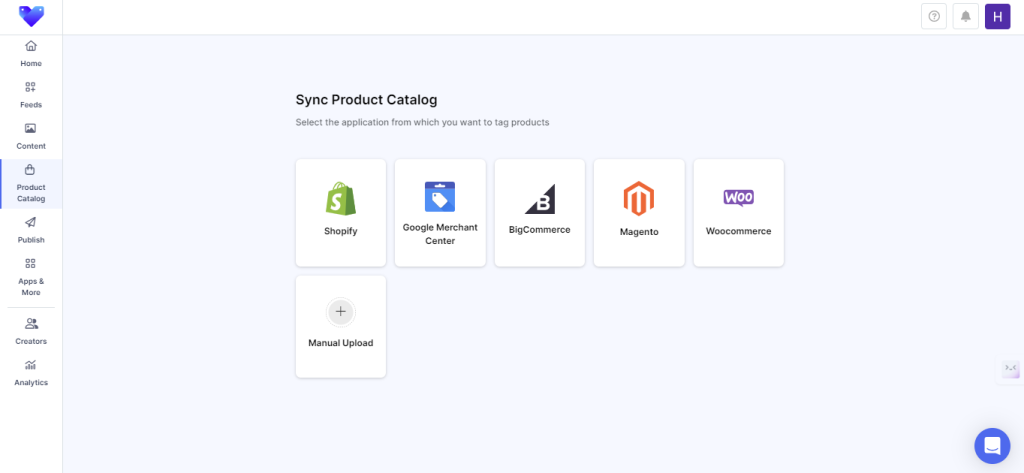
- The first step is to upload your product list. Go to ‘Product Catalog’ from the Sidebar and choose a platform to sync your product catalog.
- You can choose platforms like Shopify and auto-sync your product catalog by entering your store’s URL.
- Or, you can manually upload products through the ‘Manual Upload’ function.
- Select ‘Upload CSV File’ to upload your catalog manually to upload your entire product list. Or select ‘Add Single Product’ to list your products individually.
Product CSV File & Product ID Error
- Make sure to follow the sample CSV format as provided during the uploading process
- Error in Product ID: In an Excel sheet, when you enter more than 11 digits in a cell, the digits get truncated. Make sure to enter product ID without truncation.
- Make sure you enter the correct Product ID for each product in your CSV file.
- Without Product ID, you won’t be able to use the product page galleries option.
- Once you successfully upload your products, return to your gallery from the sidebar.
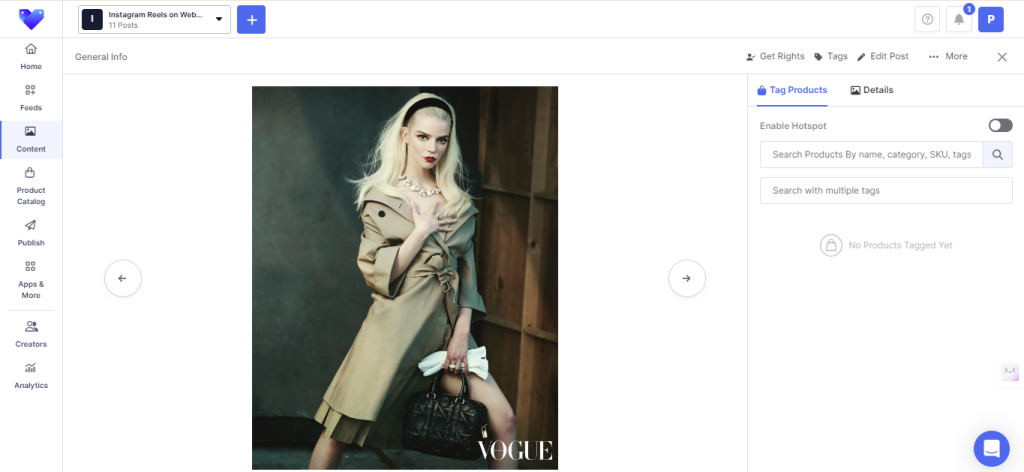
- After your catalog is uploaded, you can add shoppable tags by clicking on the Tag Products button under any post on your feed.
- Now, select products by searching them via product ID, category, or SKU. After tagging, name your tags to display on the content.
- Here, you can also enable the Hotspot feature and add multiple product tags in a single post.
After product tagging, you might want to moderate and personalize your feed before integrating it into your product pages. Let’s begin!
Section 2: Add Tags
- Now, to add tags to your content, click on the ‘Tags’ icon provided at the top of the posts in your feed of collected content.
- A pop-up will appear. Start adding tags related to your content and click on ‘Save.’
- Follow the same procedure for all the posts you would like to include in your tag-based gallery.
- Your tags are successfully saved. Now, you can easily create a shoppable gallery curated via tags.
The next step is to add product tags to turn your gallery into shoppable. Let’s begin!
Section 3 – Moderation, Design & Filter
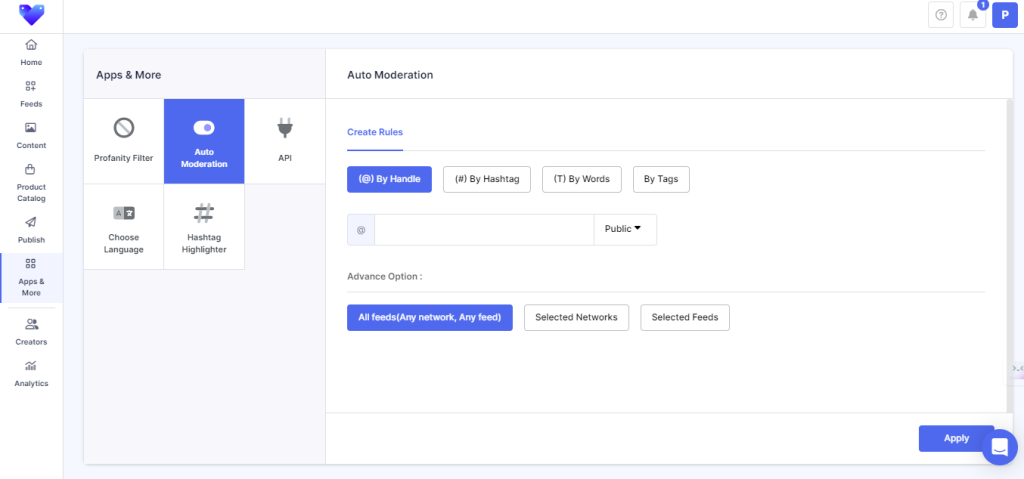
- Select the ‘Apps & More’ section from the sidebar to personalize your feed and keep it relevant.
- Features like ‘Profanity Filter’ can help your filter content through a list of words, and ‘Auto-Moderation’ to keep your feed fresh.
- Moreover, you can change your feed’s card style to make your feed presentable. In the sidebar, go to Website > Theme and pick a style.
- That’s not all! You can customize your feed further by adding a customized Background or CTAs to your feed from ‘Customizations.’
- Once done, click on the ‘Generate Code’ button on the bottom right corner of the screen.
Note: It is recommended to use the Modern Slider theme for the best experience.
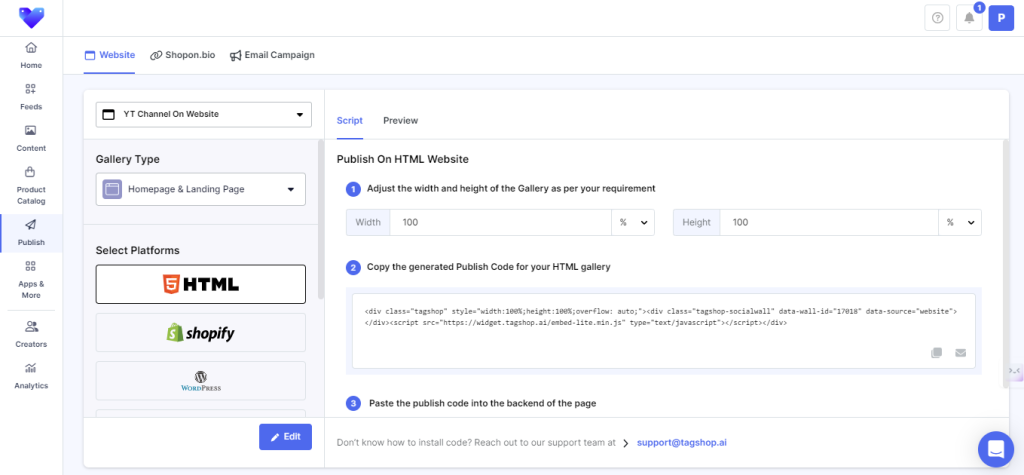
Section 4 – Publish Your Gallery
- After generating the code, a new window will appear. You will see three options from the ‘Gallery Type’ dropdown list on the sidebar.
- Homepage & Landing Page
- Product Page Galleries
- Tag-Based Shoppable Gallery
- Select Tag-Based galleries, and you will see various CMS options like HTML, Shopify, WordPress, BigCommerce, etc.
- Click on your choice of CMS. Let’s choose Shopify as an example.
- Now, add your preferred tags in the ‘Select Your Tags’ section.
- Once added, you can click on ‘Preview’ to see how your tag-based gallery looks. Or, click on ‘Generate Code’ and follow the instructions provided.
If you face any challenges and issues while publishing the galleries, then feel free to contact us through message, mail, or call. We will help you set up your galleries.


